Discover the best tween and teen birthday party ideas that your kids will adore, from spa pamper sessions to movie nights and retro parties!
Αγαπάμε!
From dream party themes to brilliant birthday party ideas and star interviews, inspiration for every event starts here!

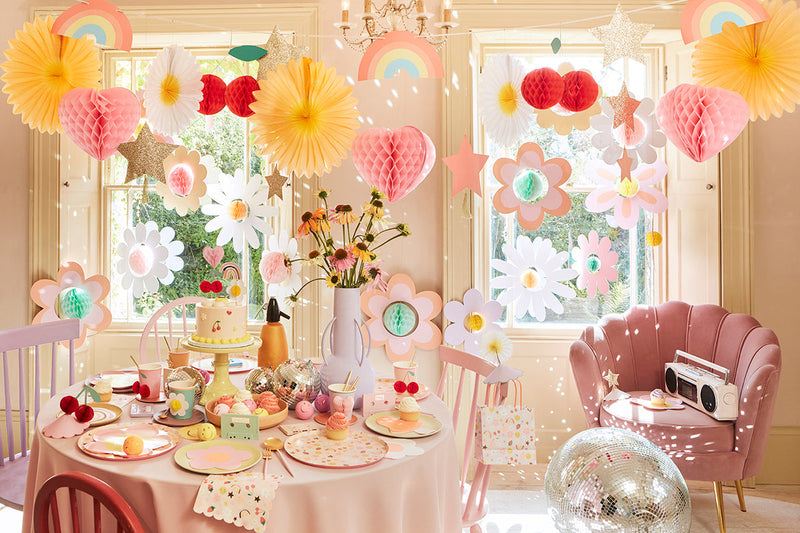
How to Set a Summer Party Table
From relaxed family lunches in the garden to elegant alfresco dinners with friends, discover how to set a summer table that’s full of colour, style and seasonal charm [...]
CONTINUE READING
Free Craft Activity: Hoopla Party Game Fun
Hoopla is an excellent game for kids of all ages to play. Perfect for parties or whenever they want to have fun. We’ve designed a colourful hoopla game for them to create, easily made from paper card and paper straws. We also reveal our favourite classic party games, which we know you’ll love too. Make the Hoopla Game Who can get the highest score? This is an amusing traditional game for the kids to make and play. Click here to download the template. You will need: A printer, paper and card, glue, scissors, sticky tape, 5 paper straws (cut to a length of 5.5 inches/14 cm. We’ve got a great range of glittery and striped straws, see here. ) and pencil and putty (or any tool for making holes in the card). How to Make: Step 1: Print out the template for the base and the hoops, and glue them onto the card. Step 2: To attach the straws, pierce holes into the base where the X’s are marked by placing a piece of putty underneath and pushing through a pencil. Make sure the holes are big enough for the paper straws.Step 3: Push the straws through the holes by approximately half an inch. Cut three slits into the bottom of each straw and fan out the slits. Tape them down flat to the underside of the base piece so that the straw stands upright. Repeat this until you have stuck down all 5 straws. To make the straws extra secure, you could glue an extra piece of card to the underside of the base.Step 4: Cut out the hoops and now you’re ready to play! Each straw is worth a different number of points. Each player throws their 4 hoops and writes down their score. Whoever scores the most points after all the players have had their turn, wins! The 3 Most Fun Party Games Ever! Our hoopla game will be a highlight of your party. Here are some other traditional games we love too – which can all have a different twist if you want to match your party theme. 1. Pin the Tail on the Donkey We’re sure you know this classic game, where blindfolded children stick a paper tail on a picture of a tail-less donkey, and the winner is the child who gets it as close to the point where the tail should be. But, have you considered tweaking this game to match your party theme? For example, ‘pin the jewel on the tiara’ for a princess party or ‘pin the patch on the pirate’ for a pirate party. Let your imagination flow! 2. Memory Game A great game to play when the kids need a bit of quiet time, or at the end of the party to get calm before they head home (parents will thank you for this!). All you need is a tray filled with memorable objects, along with a pen and paper for each child. You can make the objects match your party theme. For example, if you’re having a mermaid party, then all the objects can be underwater themed like seaweed (green tissue paper), fish candies, fish scales (sequins), a seashell and plastic whales/dolphins and turtles. Place the tray with objects in the centre of the table and set a timer for one minute to let the kids gaze at it and memorise everything. When the minute is up, remove the tray and everyone has to write down as many objects as they can remember. The child who remembers the most is the winner. 3. Musical statues and bumps Get the kids to burn off their party excitement with lots of musical games. For this, you’ll need a funky playlist, check out our Meri Meri Summer of Fun Playlist on Spotify. For musical statues, put the music on and get the kids to show off their most impressive dance moves. They then need to keep statue-still when the music stops and they’re out if they wobble. Keep playing until one person, the winner, is left. And have you tried musical bumps? Instead of standing still the players have to sit down quickly when the music stops. The last person to sit down is out. You could make this even more relevant to your party theme by getting the children to sit in special areas. For example, if you’re having a space party divide the room into the ‘Moon’, Neptune’ and ‘Mars’ zones. Tell the children to sit in a specific zone when the music stops, varying the zone each time. This will cause lots of running about which will wear the little darlings out! And have you tried musical bumps? Instead of standing still the players have to sit down quickly when the music stops. The last person to sit down is out. You could make this even more relevant to your party theme by getting the children to sit in special areas. For example, if you’re having a space party divide the room into the ‘Moon’, Neptune’ and ‘Mars’ zones. Tell the children to sit in a specific zone when the music stops, varying the zone each time. This will cause lots of running about which will wear the little darlings out!Make your birthday parties even more special with fabulous tableware and decorations. We’ve got many fantastic ranges with popular themes like unicorns, space, princesses, mermaids, pirates and knights. Or you can never go wrong with a Happy Birthday themed party! Check out our range, which includes colourful and pastel choices.
Stylish Birthday Party Ideas For Every Age
We’ve got the ultimate stylish party ideas for all ages. From roarsome dinosaur themes to elegant French tea parties – there's something for every age group.
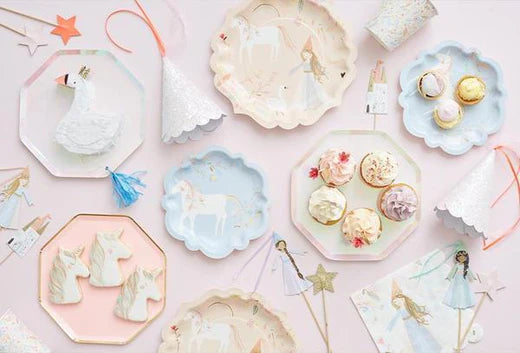
5 Princess Birthday Party Ideas
For little royals and budding princesses, throw a princess party complete with magical costumes, gorgeous garlands, and beautiful princess illustrations.
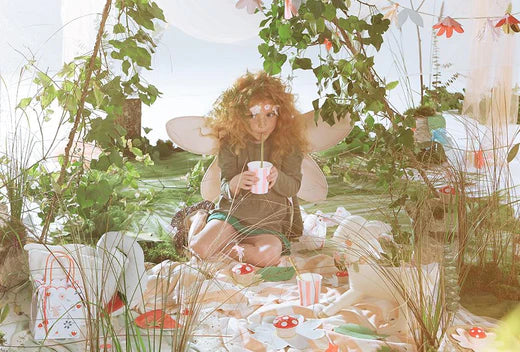
How To Host A Fairy Party
Discover our guide to hosting the best fairy birthday party, whether it’s for kids or adults – from food ideas and costume inspiration to activities galore, we have everything you need for a successful event.
Craft a Friendship Bracelet
Little people love to show their friends and family they adore them – and what better way than with a hand-crafted colourful friendship bracelet? Our talented design team have created one for your kids to make and give as a gift to their favourite person or people. We also share other craft creations, to team with the bracelet, to make it even more exciting to give and receive. How to Make the Bracelet Simply click here to download the template to make your beautiful bracelet. You will need: A printer, paper and card, scissors, pencil and ball of putty (or something to make a small hole in the card), 7 strands of thread (embroidery threads work well), each approx 20 inches long. Instructions: Step 1: Print out the loom template and stick onto some card. Cut it out and make cuts along each of the small lines. Step 2: Make a hole in the middle of the loom by putting a ball of putty underneath and pushing through a pencil.Step 3: Take 7 strands of thread and knot them together at one end, leaving an inch of thread loose at the end so you have a decorative tassel. Step 4: Push the knotted end through the hole in the middle of the loom so the knot is on the underside. Step 5: Thread each of the strands through each of the slots, you should be left with one empty slot. Step 6: Hold your loom so the empty slot is at the top. Count 3 strands to the left and move this third stands into the empty slot. Step 7: Turn your loom so the new empty slot is at the top. Count 3 strands to the left again and move it to the empty slot.Step 8: Keep repeating stage 6 and 7 and you’ll see your friendship bracelet grow from under the loom. Keep the threads nice and tight in the slots as you continue making your bracelet.Step 9: Keep going until your bracelet is long enough to tie around your wrist. When you are happy with it, remove it from the loom, tie a knot in the end and cut off the loose threads, leaving an inch at the end to make another tassel. Now you can make as many as you like and give them to your friends! 3 Friendly Ways to Present Your Bracelet 1. In a card. If you can’t see your friends at the moment, then send your bracelets by post inside a special homemade card. We’ve created 3 amazing notecards for you to make – an adorable sausage dog, dreamy sailboat and a cherry ice-cream, go here for the instructions and downloads. As an extra touch, why not include a quote about the wonders of friendship?Here are our favourites: “A sweet friendship refreshes the soul.” - Proverbs 27:9 “Many people will walk in and out of your life, but only true friends will leave footprints in your heart.” - Eleanor Roosevelt. “There is nothing I would not do for those who are really my friends.” - Jane Austen. “The only way to have a friend is to be one.” - Ralph Waldo Emerson. “Friendship is the only cement that will ever hold the world together.” - Woodrow Wilson. 2. Pop it into a piñata. Little piñata favours are the perfect way to present your bracelet to a friend. Put it inside and they’ll get a lovely surprise when they open it. Make your own mini piñata, go here for ideas or choose one of our lovely designs which include unicorns, llamas, skull and crossbones, flamingos, swans, robots, mermaids, crocodiles and rainbows. 3. Include it with a gift. If it’s your friend’s birthday then you may want to team your homemade friendship bracelet with another gift too. Look for presents that have a true friendship meaning, like our Secret Notebook necklace or a notebook for them to write notes to you, like our sausage dog, unicorn and cat notebooks.
" Κάνοντας Ουράνια
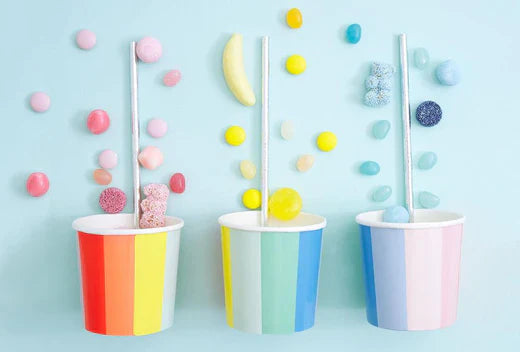
Find inspiration for your magical rainbow party here, featuring food and décor ideas – brighten up your kids' birthday with our rainbow balloon arch or piñata!